

There is something very satisfying about building your own furniture! Here I am sharing an easy tutorial on how to build and upholster a farmhouse bench!
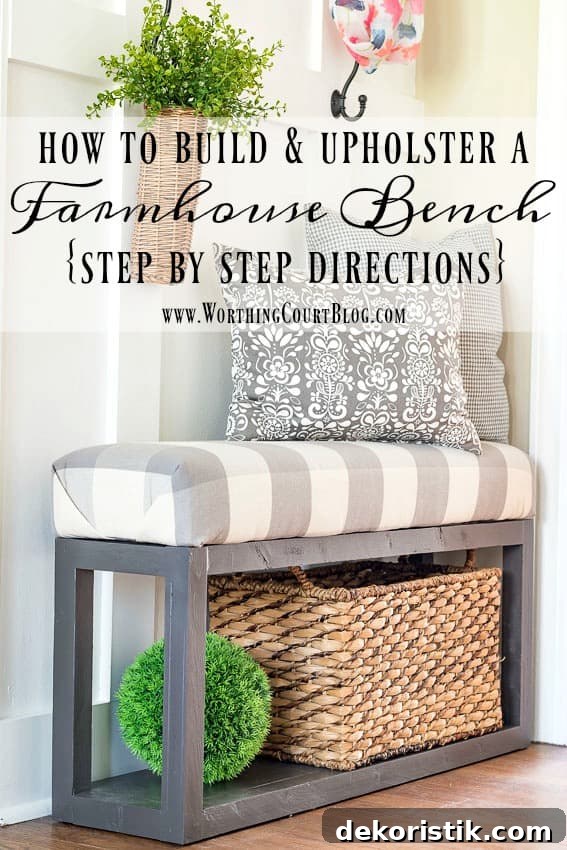
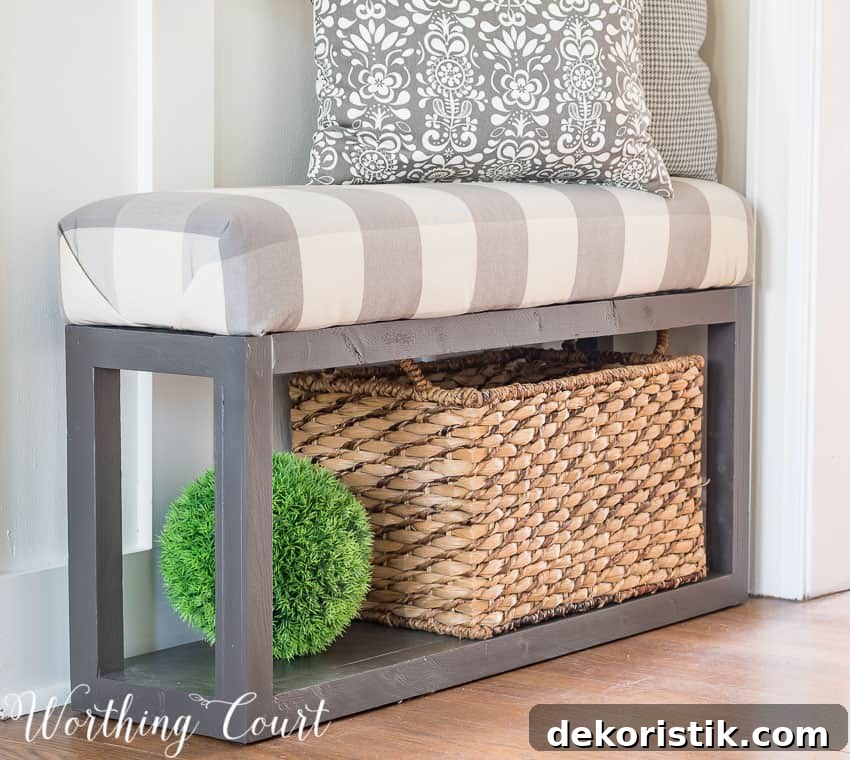
As promised, I’m back with a clear, step-by-step guide for making the farmhouse upholstered bench you saw when I shared the new board and batten wall in our foyer. This post covers building the sturdy wooden base; the upholstering and final assembly are covered in Part 2 of the tutorial.
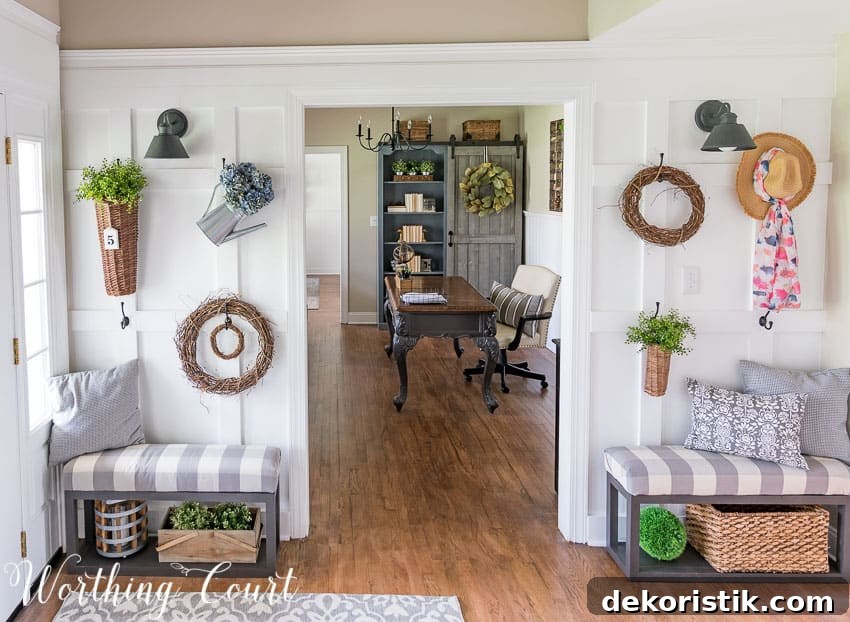
This project is approachable for a beginner with basic tools. I’ve split the full tutorial into two parts because including every detail made the post very long—Part 1 (this post) shows how to build the bench base and gives exact board measurements; Part 2 shows how to build and upholster the seat and assemble the finished bench.
UPDATED TO ADD: See Part 2 of the tutorial for upholstering and finishing the seat.
Supplies to build one bench base
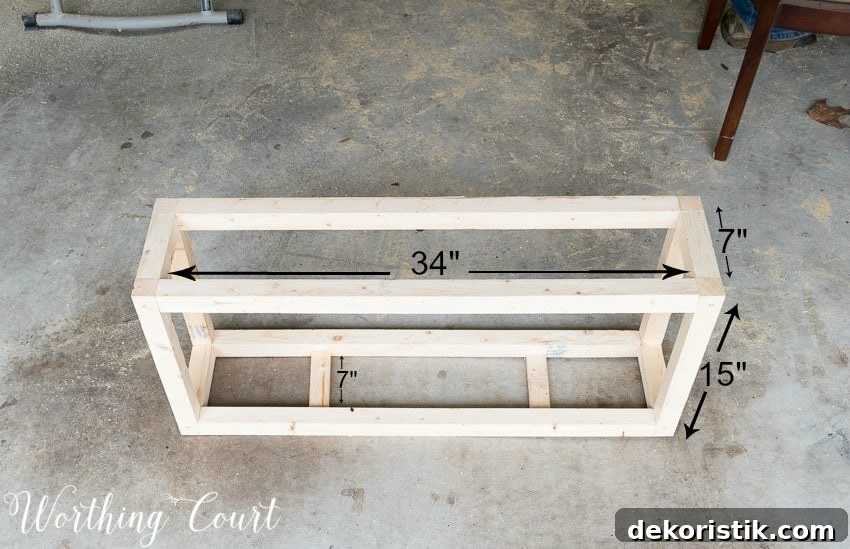
– Enough 2″ x 2″ boards to build a bench base that measures 36″ wide x 15″ high x 9″ deep. (The finished bench height will be about 20″ when the upholstered top is added.)
– One 3/4″ thick piece of plywood for the bottom shelf and seat support
– One 1″ x 2″ board — about 14″ total
– Drill and drill bits (for pilot holes)
– Chop saw (or miter saw) for clean, square cuts
– Circular saw or jigsaw (for cutting plywood)
– Screwdriver or a driver bit for your drill
– Putty knife (for wood filler)
– Palm sander or sandpaper (100–150 grit and 220 grit for finishing)
– 2½” – 3″ wood screws
– Wood glue (PVA glue)
– Wood filler
Before starting, choose the straightest lumber you can find. Boards with waves or warping will make alignment difficult and will affect the finished look. Countersink your screws, fill the holes with wood filler, and sand smooth for a professional appearance.
Tips before you begin
– Use two drills if possible: one with a drill bit to bore pilot holes and one with a screwdriver bit to drive screws quickly.
– Apply wood glue to every joint before fastening; wipe any excess glue away with a damp cloth before it dries.
– Have a helper hold pieces square and steady while you fasten them to make assembly easier and safer.
– Make sure all edges are square and ends align precisely for a tidy final result.
Step 1: Cut all the wood for the base (seat wood not included)
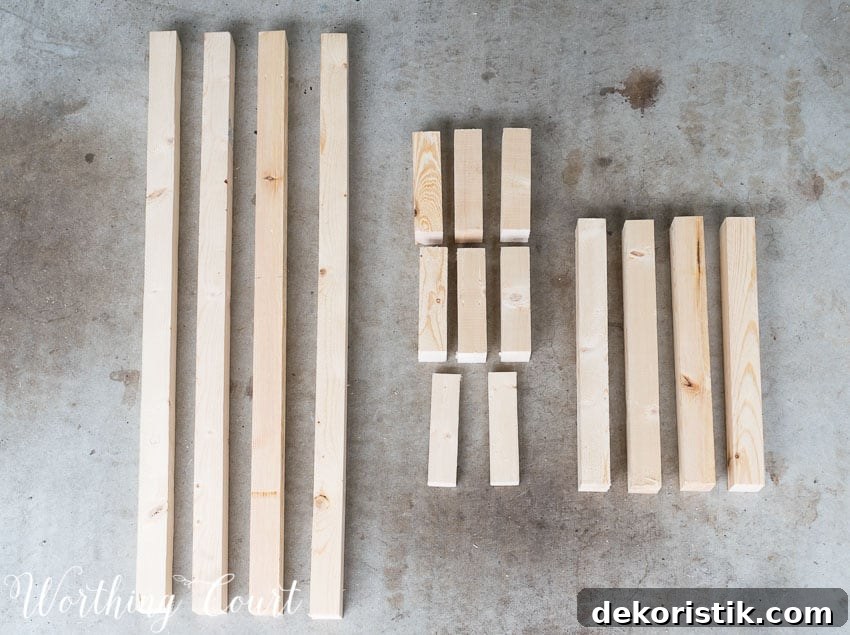
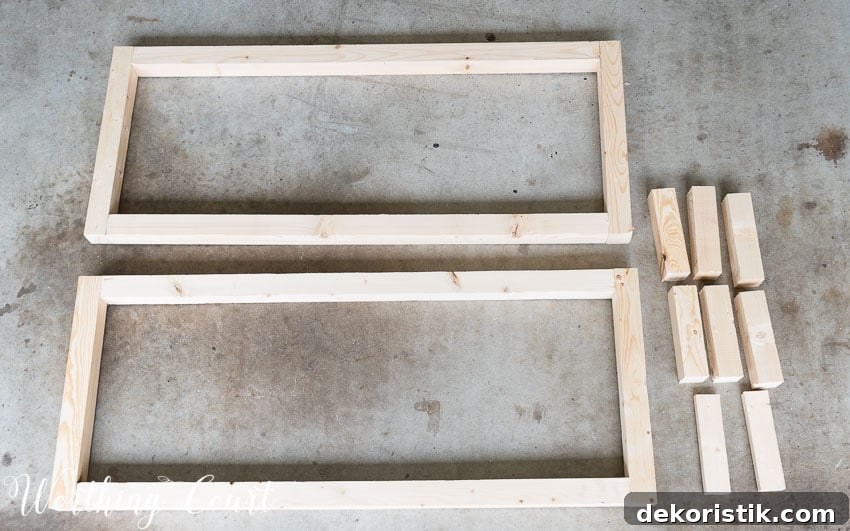
To make a bench the same size as mine (36″ wide x 15″ high x 9″ deep), cut the following pieces from 2″ x 2″ stock and 1″ x 2″:
– 4 pieces at 34″ long — 2″ x 2″
– 4 pieces at 15″ long — 2″ x 2″
– 6 pieces at 7″ long — 2″ x 2″
– 2 pieces at 7″ long — 1″ x 2″
Confirm each cut for square edges and consistent length before assembling; small variances accumulate and can cause misalignment.
Step 2: Assemble the front and back frames
Lay out the pieces for the front and back faces of the bench. Each face is constructed as a simple rectangular frame using two 34″ pieces and two 15″ pieces. Glue the joints, drill pilot holes, countersink, and secure with 2½”–3″ screws. Assemble two identical boxes—one will be the front and the other the back of the base.
Step 3: Join the front and back frames
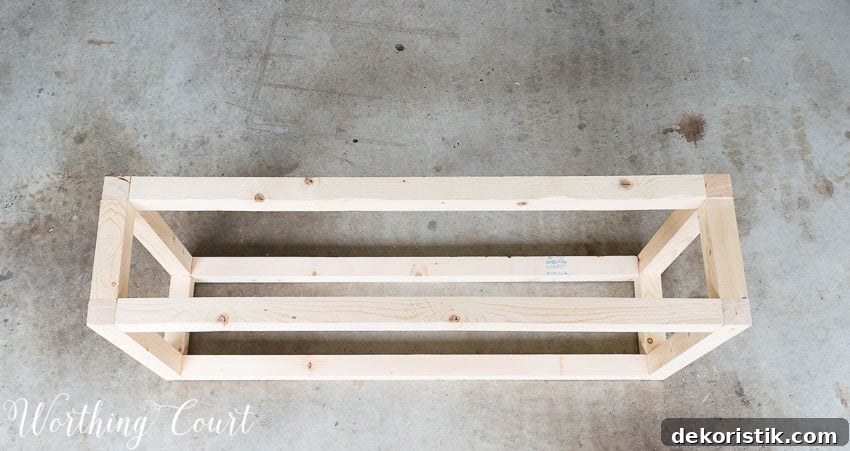
Stand the two frames upright and parallel. Place the six 7″ long 2″ x 2″ spacers between the frames: two at each end (top and bottom) and two centered to support the seat. Glue and screw each spacer into place, making sure the ends are flush with the faces so the bench will sit squarely.
Step 4: Add the bottom shelf
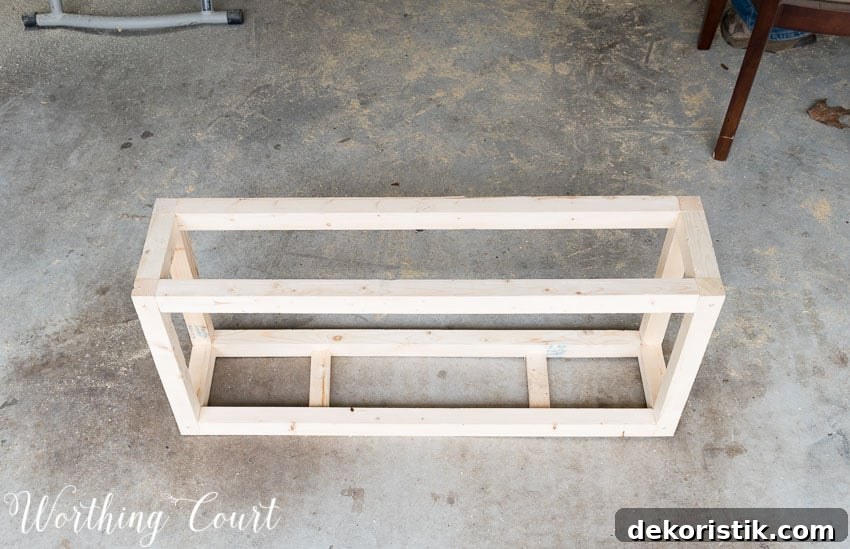
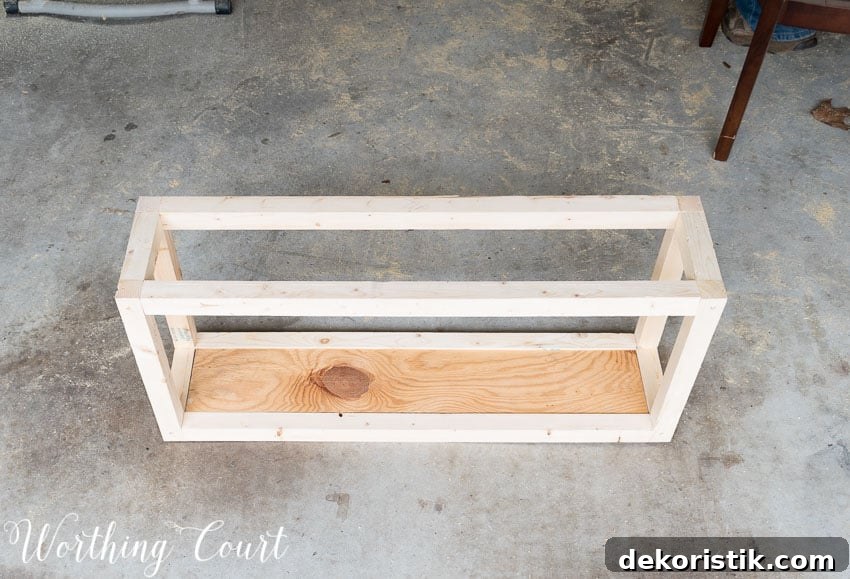
Install the two 7″ long 1″ x 2″ pieces across the bottom between the front and back frames; their bottom edges should be flush with the bottom of the bench. These act as cleats to support a lower shelf.
Cut a piece of plywood 34″ long x 7″ wide. Set it onto the 1″ x 2″ cleats and glue and/or screw it in place. This plywood shelf will add rigidity to the base and provide storage space beneath the seat.
Step 5: Add seat supports
Add the remaining two 7″ long 2″ x 2″ pieces between the front and back frames at the top to serve as support for the upholstered seat. Their tops should be flush with the top edges of the frames so the seat will sit level. Fasten with glue and screws, checking for squareness as you go.
Step 6: Fill, sand and finish the base
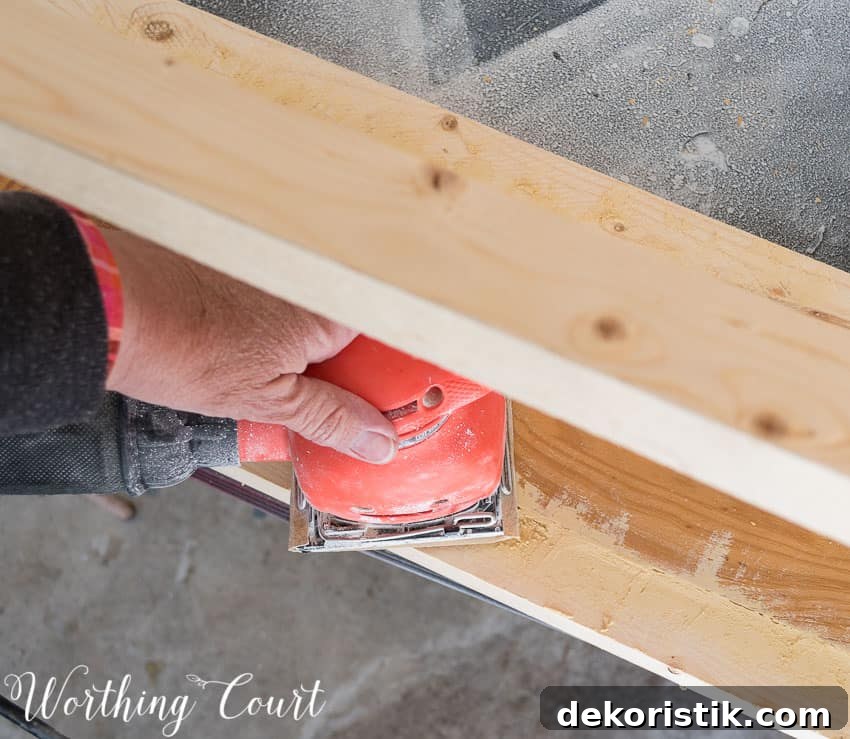
Fill all screw holes and any gaps with wood filler. When the filler is dry, sand everything smooth—start with a coarser grit to remove high spots and finish with a fine grit for a clean surface. Give the entire base a light sanding to remove splinters and prepare it for paint or stain.
Now you have a completed, sturdy bench base ready for the upholstered seat. Proceed to Part 2 for step-by-step instructions on building the seat, adding padding and fabric, and finishing the bench for a farmhouse look.
Sharing at THESE great parties.