
Earlier this month I shared Part I of our beach condo tour — the entry hall, bunk beds, living room and kitchen. Now here’s the rest of the story: the bedroom and bathroom renovations. If you saw how small the place is (just over 500 sq. ft.), remember one important fact — it’s on the beach. Below is the floor plan to refresh your memory.
Bedroom: Before and After
The bedroom and bathroom were just as disappointing as the rest of the unit when we first saw it: dirty walls, sticky, smelly carpet, corroded door knobs and a general sense of neglect. Because the rooms are small, most photos capture only a corner at a time. Imagine you’re standing in the middle of the room and turning slowly to take everything in.
Initial condition: the mattress sat on the floor during early stages of renovation because we were removing all of the furniture. We slept on blow-up mattresses our first night — I was too nervous to get close to the filthy carpet!
After removing the old, grimy finishes and cleaning up, the same corner looks much fresher and brighter:
Doors were especially grimy; I brought some of them home to strip and refinish. A lot of buildup came off with elbow grease and patience.
All of the soft furnishings in the bedroom were handmade: the upholstered headboard, a box-pleated bedskirt made from the same fabric, coordinated pillow shams and a bolster with decorative cording and a covered button, plus a blackout-lined roman shade tucked under a box-pleated valance. Everything was sewn in my basement workshop to create a cohesive coastal look.
Bedroom improvements at a glance:
- Removed nasty carpet and installed durable laminate hardwood
- Replaced closet doors and updated the closet interior
- Replaced door hardware
- Painted throughout
- Added a ceiling fan and an air-conditioning unit
- Replaced baseboard heater
Bathroom: Before and After
The bathroom was small and grimy — the tub and surround were an off-white that had seen better days. Early photos are a bit blurry because they were taken before I started blogging regularly, but they clearly show how much the space needed help.
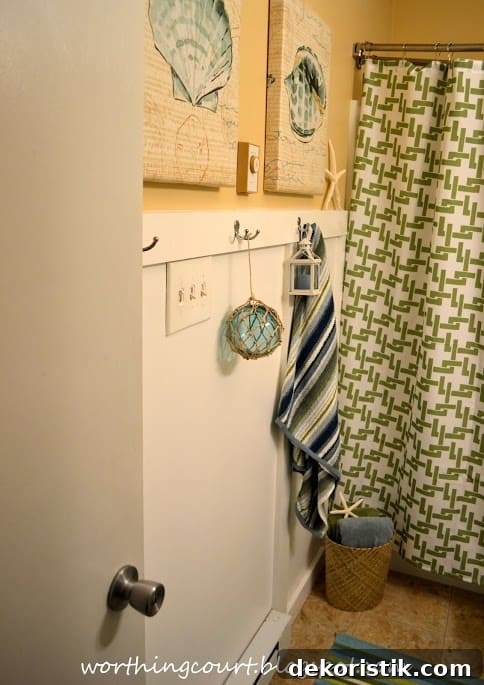
After renovations the bathroom felt bright, clean and beach-appropriate. I found a ready-made shower curtain and had a friend add a large “H” monogram for a personalized touch.
To save money, the tub/shower surround — though dirty and discolored — was structurally sound. We hired a professional resurfacing company (PermaCoat) to refinish it to a crisp white. The finish has held up well and transformed the space.
We also removed a closet to install a stacked washer and dryer — a practical upgrade that lets us launder linens at the condo instead of hauling them home. The closet was so musty I wouldn’t have used it anyway.
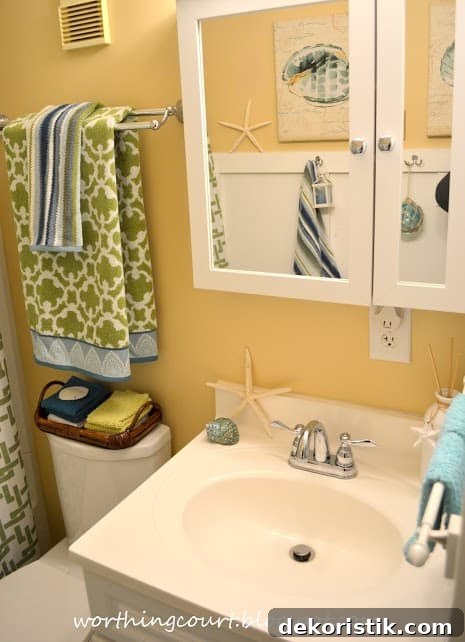
The sink area also needed attention. The original mirror was an unfortunate DIY attempt, so we replaced it with a mirrored cabinet that offers storage and a cleaner look.
For a convenient towel solution I used a small magnetic curtain rod from Lowe’s and attached it to the side of the dryer for hand towels.
Bathroom improvements at a glance:
- Replaced damaged sheetrock and painted
- Removed a closet to add a stacked washer/dryer
- Installed a new sink and vanity
- Replaced sink faucet, tub faucet and shower head
- Replaced vinyl flooring
- Installed new light fixture and mirrored cabinet
- Replaced the toilet and door hardware
- Replaced shower curtain rod and refinished the tub/shower surround
Final Thoughts and a View
The full renovation took about four months. Our priority was making the condo livable while we completed the work. It’s still fairly simple in terms of decoration, but I have plans to add more personality over time.
One evening on the deck I captured a photo of the moon during the blue hour — a beautiful reminder of why we invested the time and effort to create our little beach getaway.
At the moment we’re hoping any approaching storms move east out to sea and leave our beaches untouched. Thanks for taking the tour — I hope you enjoyed seeing the before-and-after transformation of our small beach condo.