
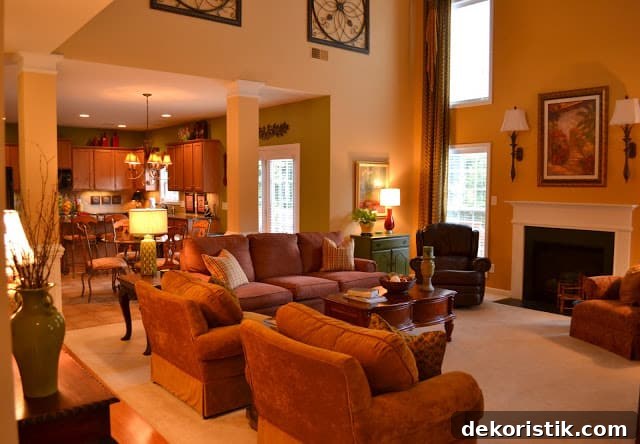
Our family room is the most used space in the house—more even than the kitchen. What that says about how often I cook is probably best left unasked.
This is the view into the family room from the foyer. The wall color is one of those shades that’s hard to capture accurately in photos.
You can see the left end of the couch where I usually sit to blog.
From this angle you can also see how open the family room is to the kitchen—great for entertaining and keeping an eye on things while you prep dinner or wash up.
The dark shape draped over the back of the couch is Maggie, our Diva Dog—she always pops into photos the moment a camera comes out.
To the right is Pookie’s favorite chair: a leather recliner that rocks, swivels and reclines. According to Pookie, it’s perfect. I’ll keep my own opinion to myself.
Above the green chest hangs another painting by my Auntie Syl—one of several family-made pieces that add personal charm to the room.
On the left side of the room is a console table and mirror. I tried to tone down the mirror’s brighter finish with a stain, but it still reads a bit bold—painting is likely the next step.
One of my favorite little details is this lamp—it started life as a vase that I converted into a lamp, and it adds warm, personal light to the seating area.
Two chairs sit opposite the console table and mirror with a clear walkway between them, creating a cozy conversation nook that doesn’t obstruct traffic through the room.
The doorway on the left leads to the foyer and living room, while the doorway on the right opens to the dining room.
Entering from the dining room gives you this view into the family room, and you can spot the office entrance on the right.
Here’s a straight-on shot of the built-in bookcases and entertainment center. We removed the center doors to make room for the flat-screen TV.
A closer look at the right bookcase shows small speakers on top and the decorative styling I used to lighten the overall look.
I didn’t like how dark the backs of the bookcases were, so I cut sheets of 1/4″ plywood, covered them with burlap using spray adhesive, and placed them behind the glass shelves. To finish the look I glued decorative cording around the edges for a clean, styled appearance.
The burlap backdrop adds texture and a lighter background so accessories and books stand out more clearly on the shelves.
This room is two stories tall, which I love for the volume it creates, though it can be a challenge to decorate. I embraced the height by placing large accessories atop the entertainment center, hanging decorative metal plaques above the couch, and using two-story drapery panels to make the windows feel intentional and grounded.
To finish the tour, here’s a bird’s-eye view of the room and a practical tip for styling bookcases: if the top of your bookcase sits below the crown moulding and you want to display items on top, cut a sheet of luan (or similar thin plywood) to fit the top and simply lay it in place. It elevates your display without permanent attachment and keeps the view neat from above. We had our luan cut to size at the hardware store.
And one last photo of Maggie—because she insists on being part of every room tour.