
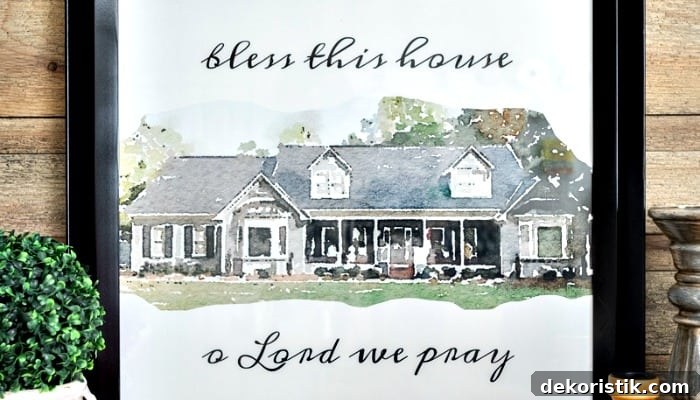
Learn how to create and customize a watercolor portrait of any photo using just your phone. A framed image of your home makes a striking wall display and doubles as a thoughtful housewarming gift.

If you saw the final before-and-after reveal of my foyer makeover, you may have noticed the DIY watercolor portrait of our house hanging by the front door. I added a short sentiment to mine and love how it greets guests and family alike.
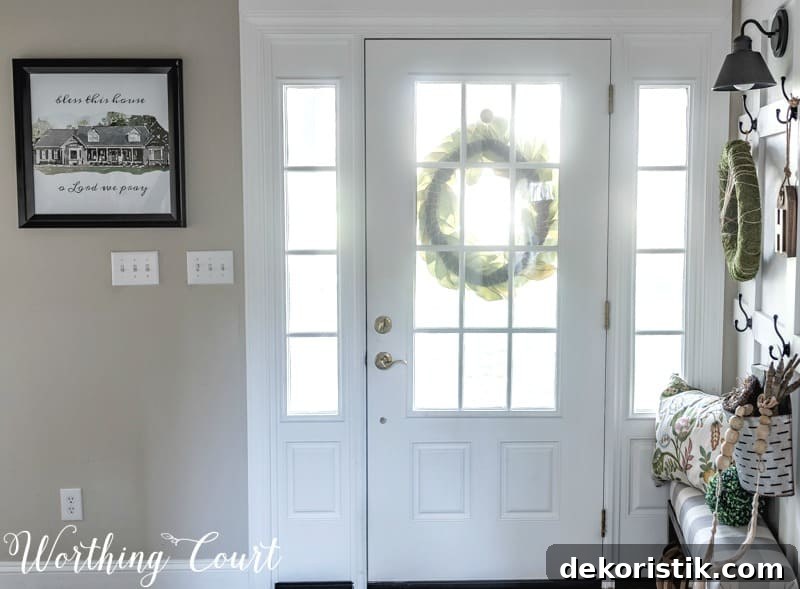
Full disclosure: I’m not a trained watercolor artist and I can’t freehand a realistic wash to save my life. But thanks to apps that mimic watercolor effects, you can turn a simple photo into a gorgeous watercolor-style print without ever touching a brush. Below I’ll walk you through the process from photographing your home to creating a printable file you can frame.
The Watercolor Tutorial
This guide is detailed, but the steps are straightforward and repeatable. Once you try it a couple of times, the workflow will feel quick and intuitive. The core idea: capture a photo, apply a watercolor filter on your phone, then refine and assemble the final print on your computer.
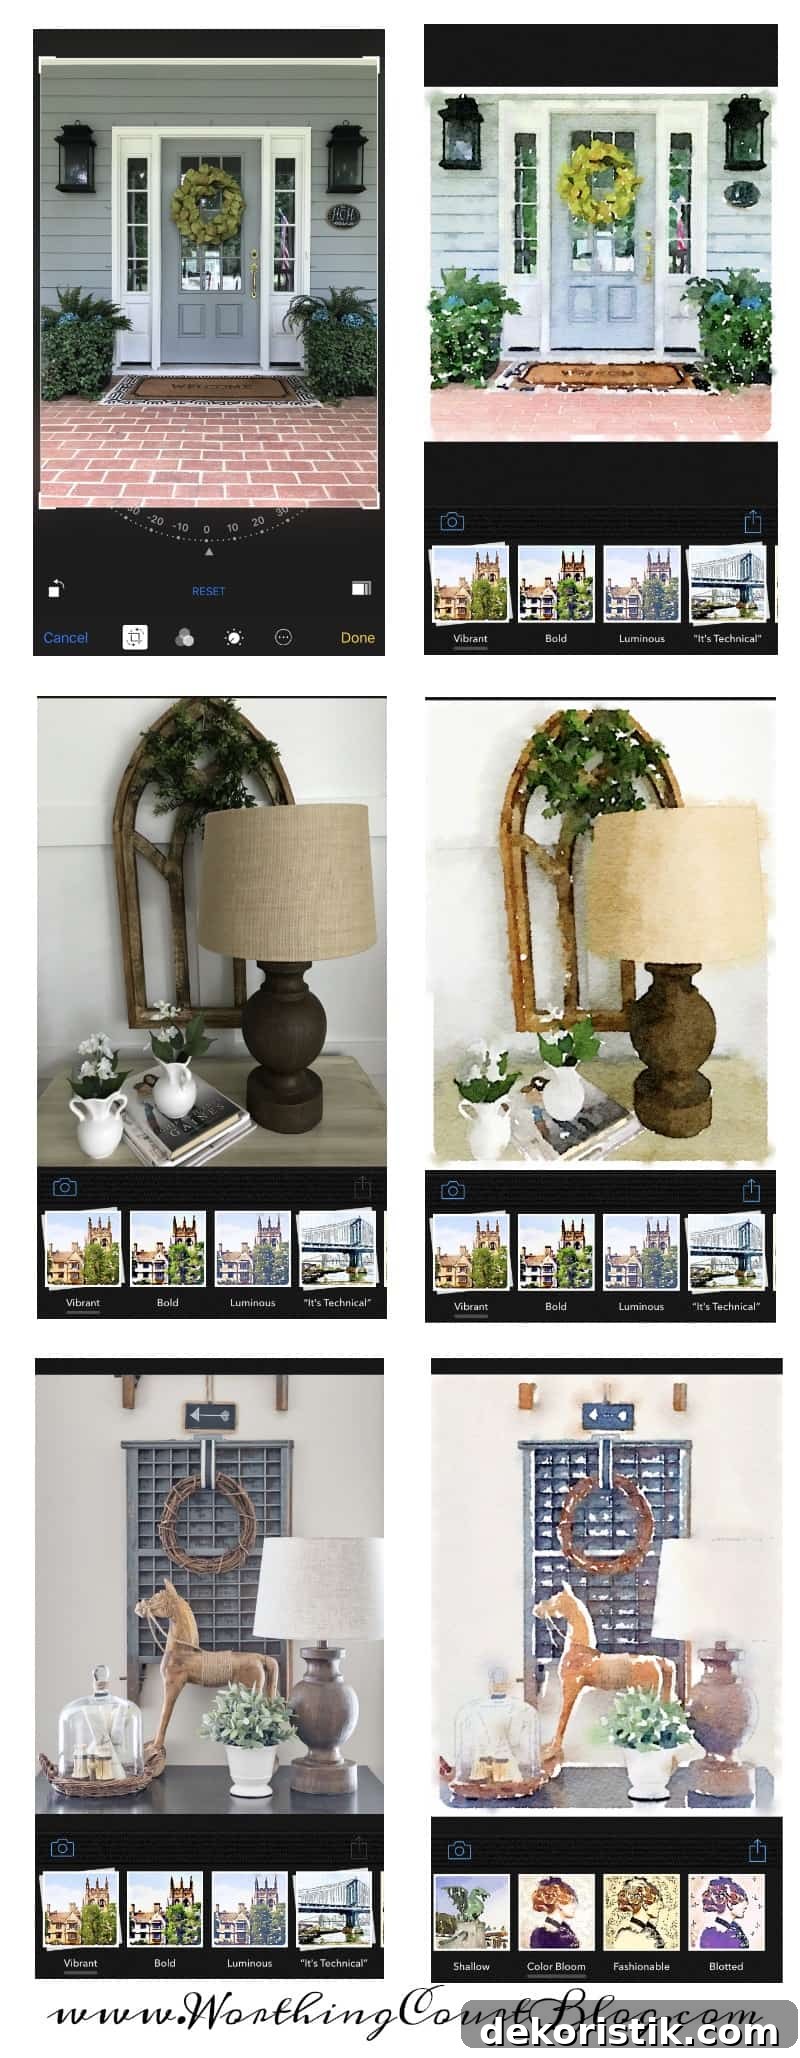
There are watercolor-effect apps for both iPhone and Android devices. On iPhone, I used the Waterlogue app because it consistently produces beautiful, painterly results. If you have Android, search your app store for “watercolor” or “waterlogue-style” apps to find a comparable effect.
Let’s get started with step-by-step instructions.
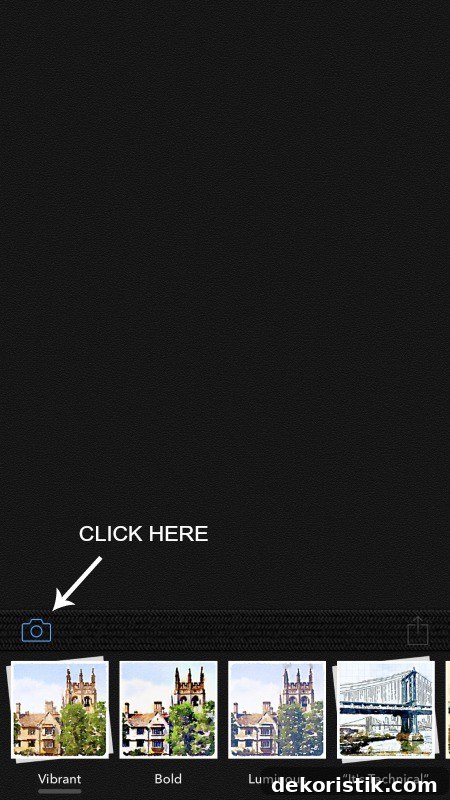
1. Open the Waterlogue App (or a Similar App) and Choose Your Image
Launch the watercolor app on your phone and either select an existing photo from your library or take a new picture of your house or subject. The app will usually show options for importing or capturing an image.

2. Select or Take a Photo
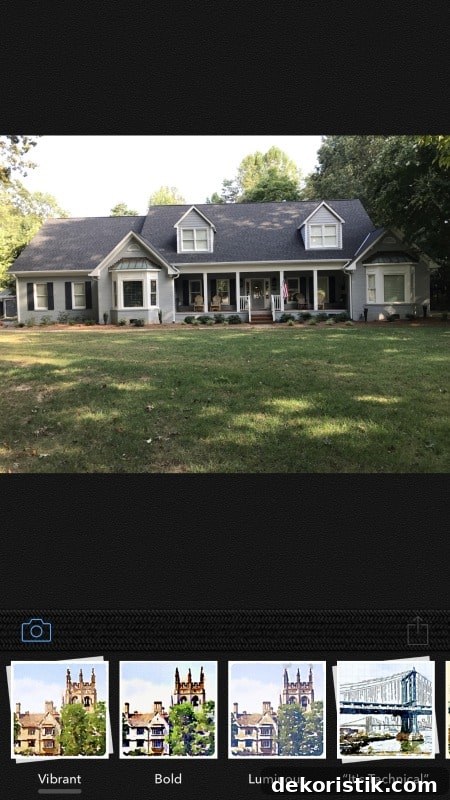
For this project I photographed the exterior of my home, carefully composing the shot so the architectural details and entry are nicely framed. Good lighting and a steady hand will help the watercolor effect look its best.
3. Apply the Watercolor Effect
Most watercolor apps offer several presets. In Waterlogue you can swipe through multiple styles; I usually choose a “Vibrant” or similar setting for clear color and defined edges. Tap the effect and watch your photo transform into a watercolor painting.
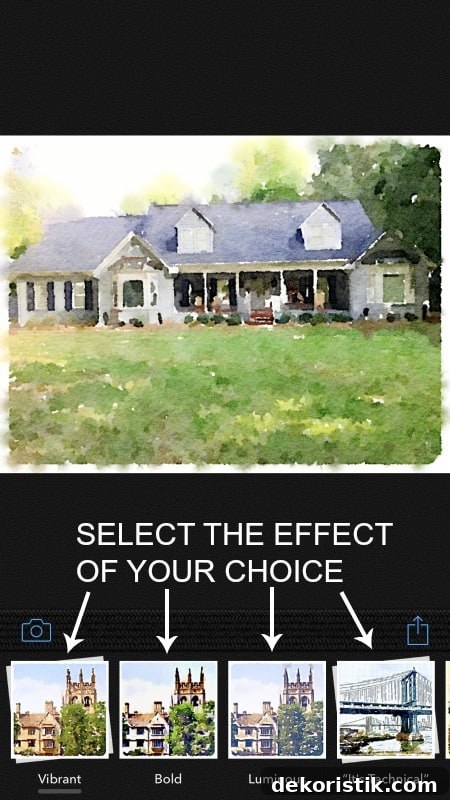
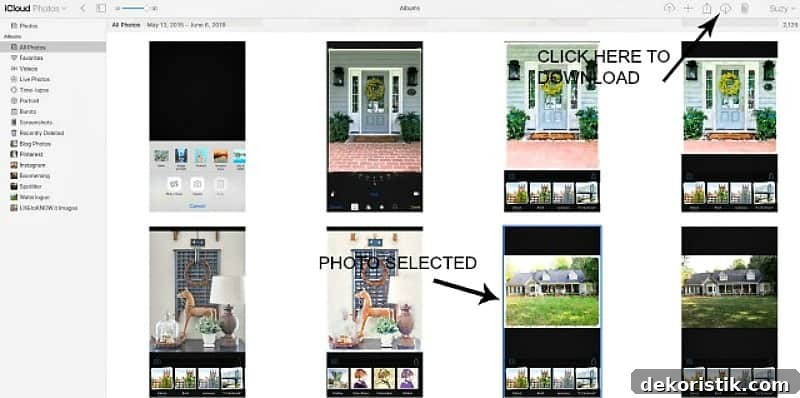
4. Transfer the Watercolor Image to Your Computer
Save the processed image to your phone, then move it to your computer. If you use cloud syncing (such as iCloud or another photo backup), the image should be readily available on your desktop. Otherwise, email, AirDrop, or a USB transfer will work. The goal is to have the watercolor image file on your computer for further editing and assembly.
5. Use PicMonkey (or Similar Editing Software) to Build Your Wall Art
I used PicMonkey to combine the watercolor image with a background, add text, and prepare the final print file. You can use any image editor that supports transparent canvases and overlays. In PicMonkey, choose DESIGN and enter a custom canvas size based on the final print dimensions you want.
Decide the pixel dimensions based on the desired print size and print resolution. For example, for a 20″ x 20″ print at 200 DPI, set the canvas to 4000 x 4000 pixels. Using 200–300 DPI is a good standard for print quality.

6. Create a Transparent Canvas
When your custom canvas opens, choose a transparent background. This allows you to add the watercolor image as an overlay and erase parts of it selectively so the watercolor blends naturally into the final composition.
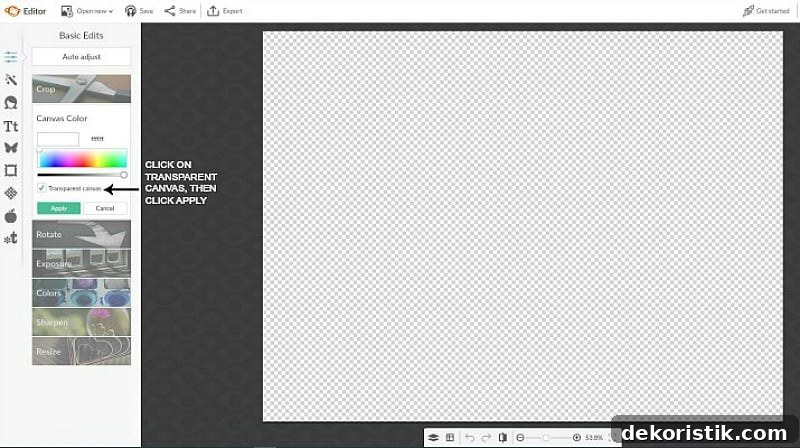
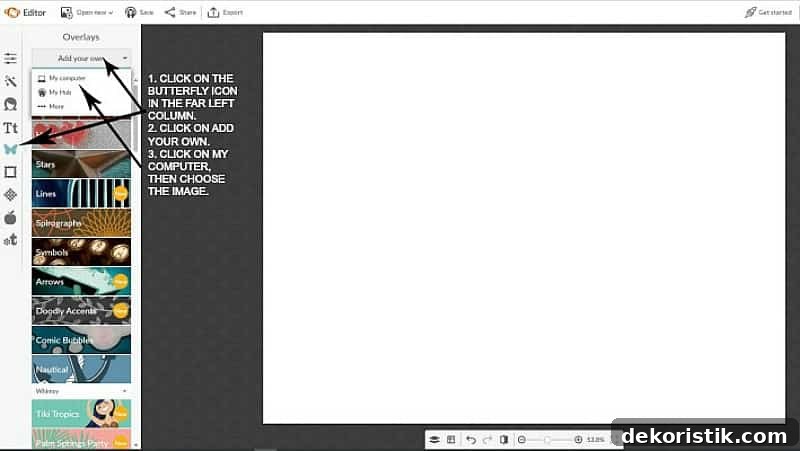
7. Add the Waterlogue Image as an Overlay
Import the watercolor image file and add it as an overlay. Position and scale it so the main subject sits where you want it on the canvas. Using an overlay keeps the watercolor texture intact while letting you control placement, margins, and surrounding space.
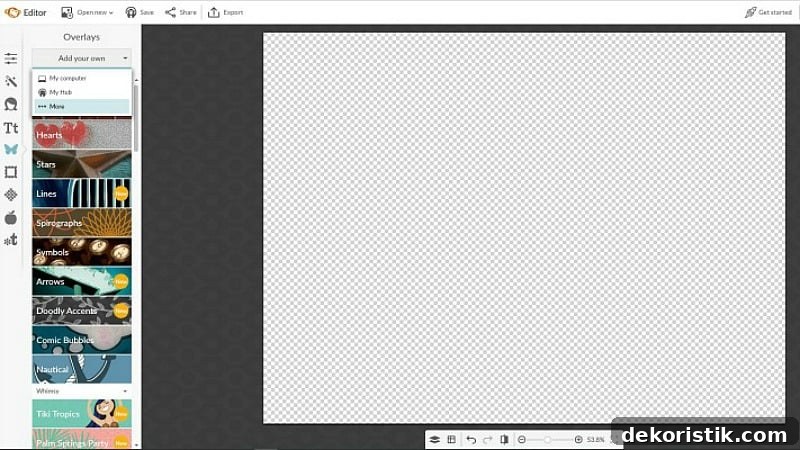
8. Edit the Overlay to Shape the Composition
Use the eraser tool to remove unwanted parts of the watercolor overlay and create soft, rounded edges where the painting should blend into the background. Adjust the eraser size for precision around details like roofs, porches, or hedges. When satisfied, export and save this edited overlay image to your computer.
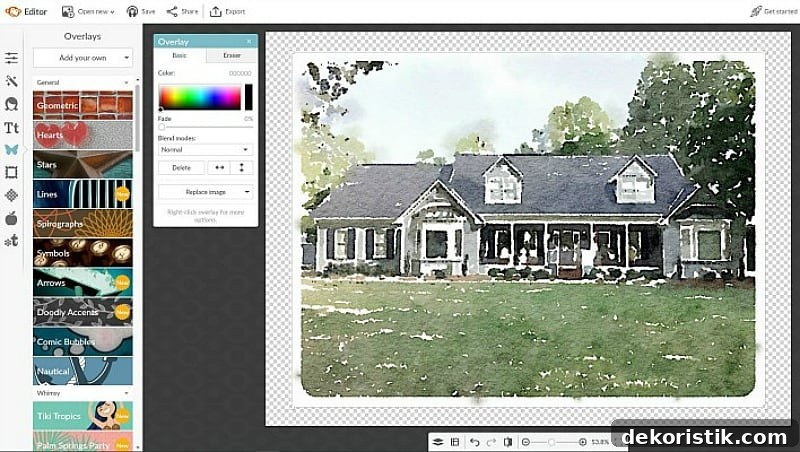
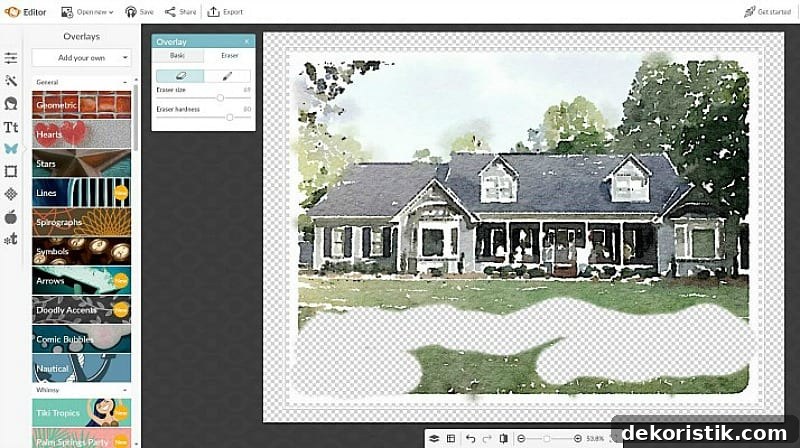
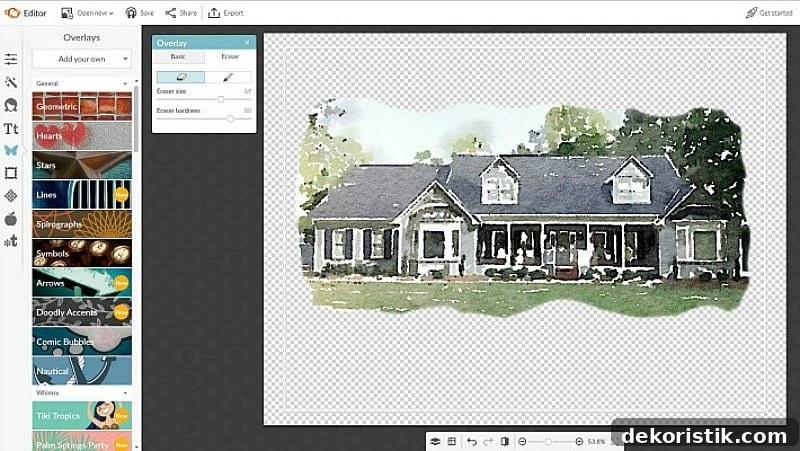
9. Create the Background Canvas
Create a second canvas at the same pixel size (for example, 4000 x 4000). This time choose a solid background color—white is classic and frames well, but soft neutrals or pastels can also complement the watercolor tones. Apply the color and save the background canvas.
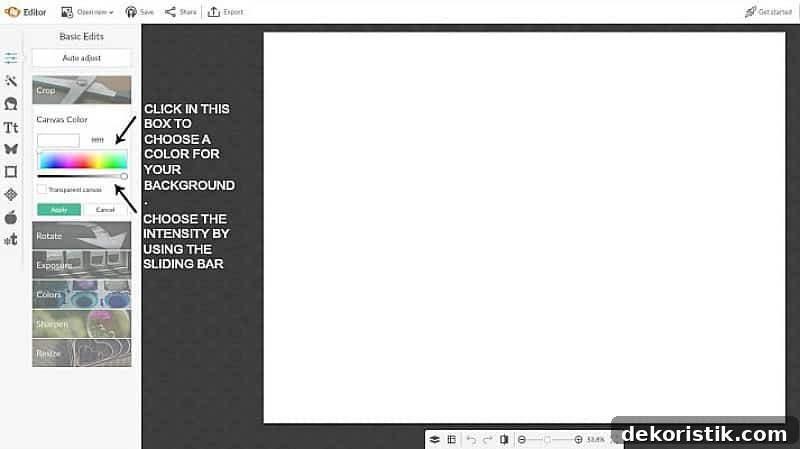
10. Place the Edited Watercolor Overlay on the Background
Import the edited watercolor overlay onto your background canvas. Position and scale it so the composition looks balanced. Leave room above and below if you plan to add wording or dates.
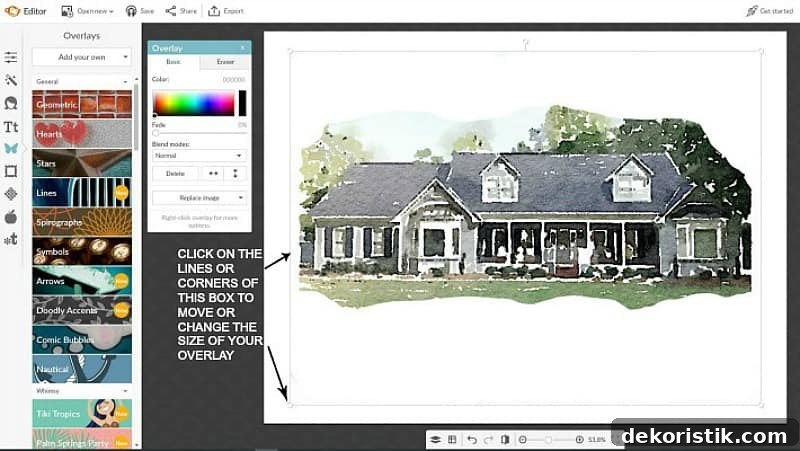
11. Size and Align the Overlay
Drag the overlay to the desired location and use the corner handles to resize it. Consider symmetry and spacing if you plan to add text or other design elements. Centering the image with ample white space often yields a clean, gallery-style look.
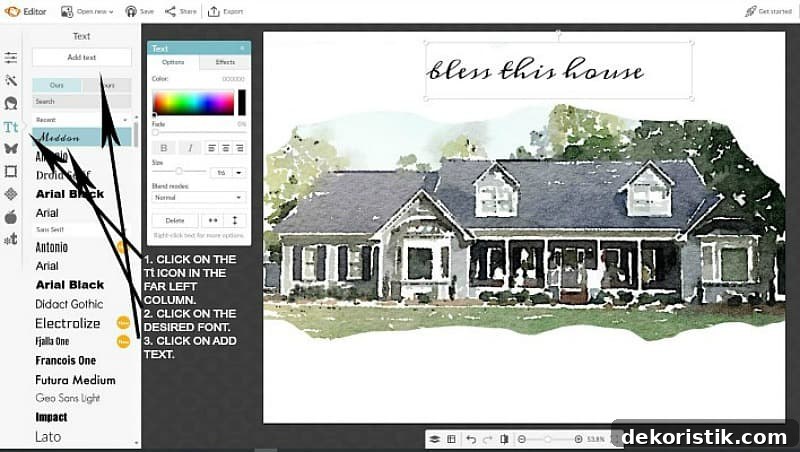
12. Add Text or Personal Details
If you want a title, address, name, or a short sentiment, add text using your editor’s text tool. Choose legible fonts and sizes that complement—but do not overpower—the watercolor. Move and resize text boxes until the balance feels right.
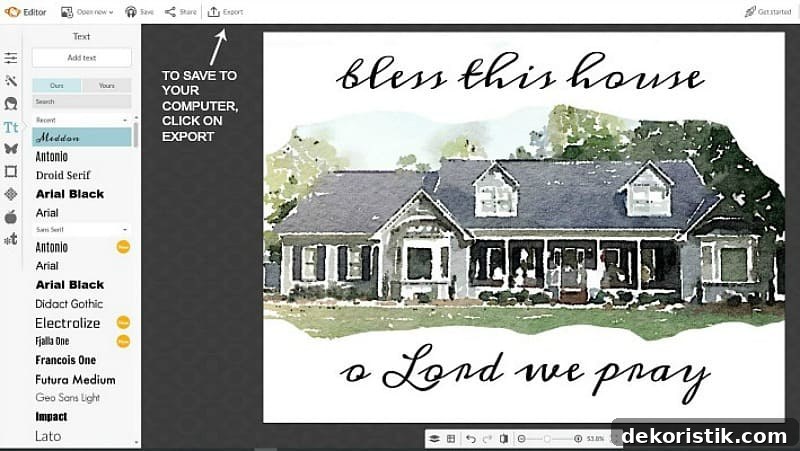
13. Save and Print Your Final Artwork
Export the finished file at full resolution and save it to your computer. For large prints, use a print shop or online lab that accepts high-resolution image files. You can deliver the file digitally or on a USB drive. If possible, preview a print proof to confirm colors and cropping before final printing.
14. Display and Enjoy Your Watercolor Portrait
Even though you didn’t physically paint the piece, a lot of creative decisions go into the result—composition, effects, color balance, and typography. The finished print makes a meaningful, handmade-feeling piece of decor that can personalize your home or make a heartfelt gift.

Watercolor apps let you experiment with any subject—houses, pets, landscapes, or still lifes. Small framed pieces make charming accents for entryways, shelves, or bedside tables. Have fun trying different presets and layouts, and feel free to experiment until you find a style that fits your home.
If you try this method, I’d love to hear how it turned out—share your questions or results so others can get inspired.